A bright white smile gives a look of strength, good health, and beauty. Stains appear when you drink coffee, red wine, or simply grow older. At-home whitening strips give a simple fix. This guide tells you all you must know to reach a bright smile with ease.
What Are At-Home Whitening Strips?
At-home whitening strips are slim plastic pieces that hold a gel with peroxide. The strip hugs your teeth so the gel meets the stained parts closely. Many well-known brands make strips that fit into your day without fuss.
Benefits of At-Home Whitening Strips
-
• Ease
Strips are easy to use. You can put them on while doing chores, watching TV, or riding on the bus. -
• Low Cost
Strips cost much less than in-office treatments that charge many dollars. Top brands give good results for a small price. -
• Time Control
Strips come with guides that let you choose your own time. Most suggest 30 or 60 minutes a day for one or two weeks. -
• Fast Change
Many see brighter teeth in just a few days when they use the strips each day. Best results show in one or two weeks.
How to Choose the Right Whitening Strips
When you pick your strips, check these points:
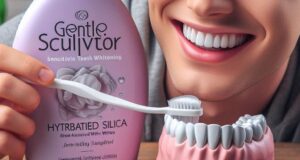
• Active Material
Choose strips with hydrogen peroxide or carbamide peroxide. These break the stain up well.
• Sensitivity
If your teeth hurt, pick strips made for sensitive mouths. Some add parts that calm the pain.
• Brand Trust
Find brands with good reviews. Many brands use tests and dentist support to build trust.
• Clear Steps
Read the package rules. Clear steps help you get the best end and cut the risk of pain.
How to Use At-Home Whitening Strips Effectively
Follow these simple steps:
-
• Clean Teeth
Brush your teeth to take away plaque. This helps the strip hold fast. -
• Dry Teeth
Pat your teeth with a tissue. A dry surface helps the gel stick. -
• Place the Strip
Open the package and place the strip on your upper or lower teeth. Make sure the strip meets your tooth line. -
• Wait
Keep the strip on for 30 to 60 minutes as told by the package. -
• Remove and Rinse
Peel off the strip and throw it away. Rinse your mouth to clear off remaining gel. -
• Rest Your Teeth
Do not eat or drink food that stains for a few hours after use.
Potential Side Effects and Cautions
Some may feel minor sensitivity or see red gums. To lower these risks:
• Start with fewer uses until you learn how your teeth feel.
• Use a toothpaste with fluoride to help strong teeth.
• Ask your dentist today if you have prior issues, or if you are pregnant or nursing.
Conclusion
At-home whitening strips bring a simple way to change your smile. Pick the right type, follow the steps, and care for your teeth as you work. With steady use and care, a bright smile is in reach. Enjoy your steps to a better smile, and let your teeth shine with every look.